Prerequisites: At least one acquired phone number and one configured agent.
Manage phone numbers and channel assignments
Agent Assignment
Assignment Overview
Each voice agent can be assigned up to three separate phone numbers:- Inbound Profile: Receives incoming calls for this agent
- Outbound Profile: Makes outgoing calls from this agent
- SMS Profile: Sends and receives SMS messages for this agent
Assignment Rules
Exclusivity: Once a phone number is assigned to an agent profile, it becomes unavailable for other usage:- One number cannot be inbound for multiple agents
- Same restriction applies to outbound and SMS profiles
- Numbers can serve different profiles for the same agent
Step-by-Step Assignment
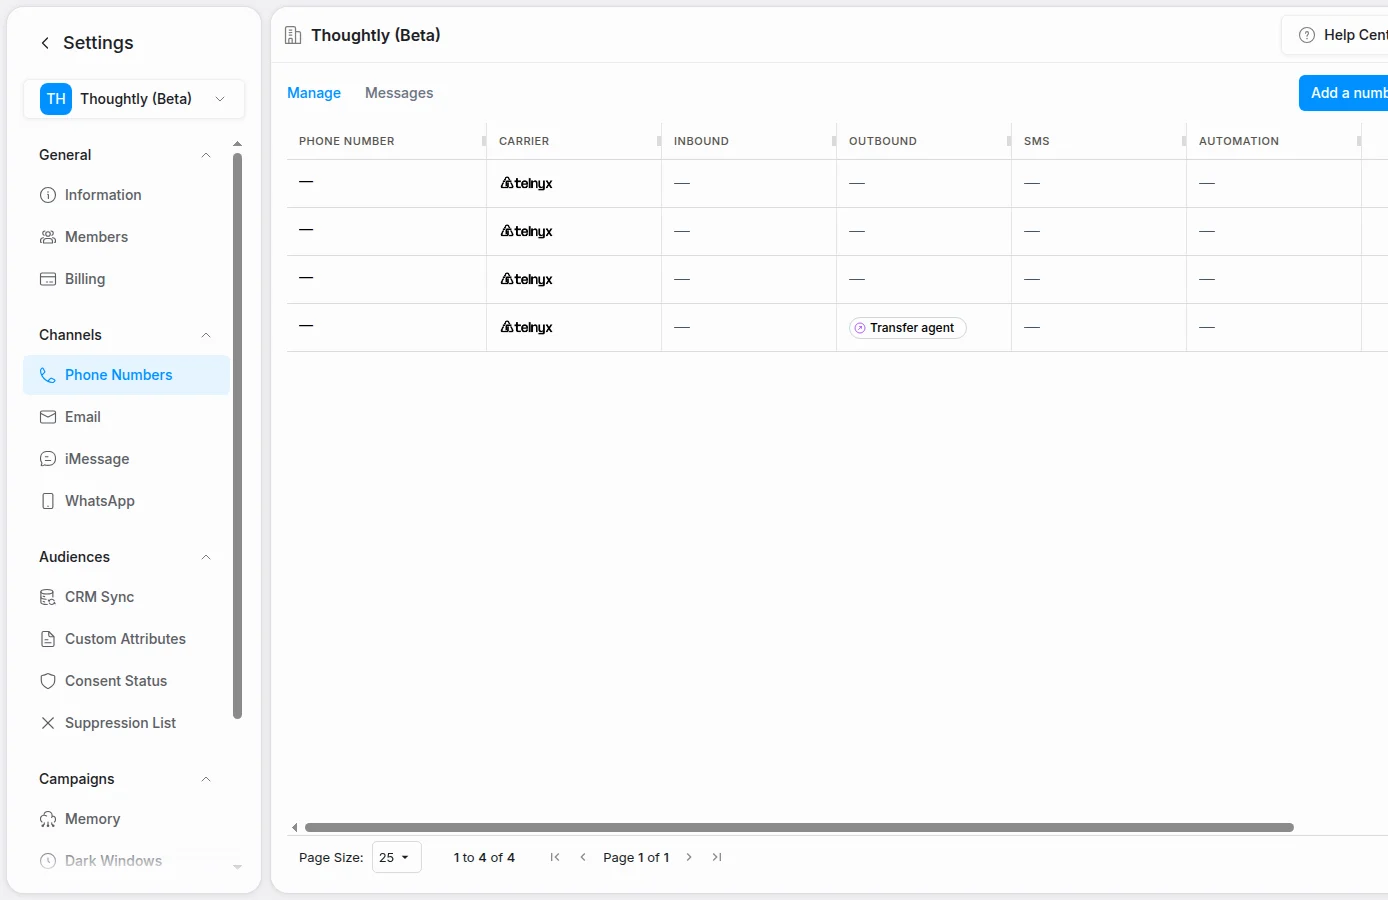
- Navigate to Settings → Phone Numbers in the platform navigation
- Locate the number you want to assign in the table
- Hover over the pencil icon in the Actions column
- Click Edit when the option appears
Phone number edit action
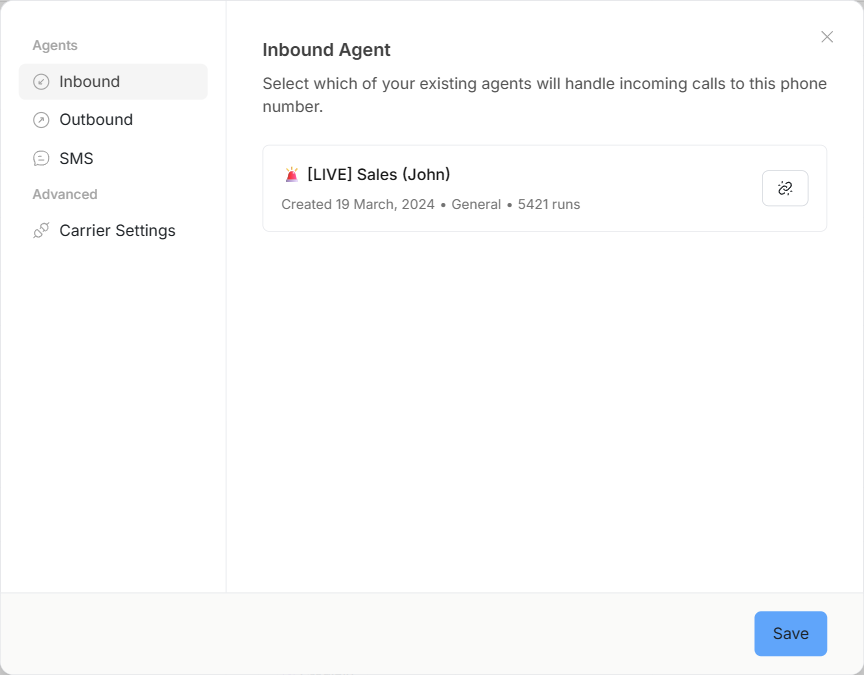
Assignment Modal
The edit modal provides three assignment dropdowns:Inbound Profile
- Select which agent will receive incoming calls to this number
- Only one agent can be assigned per number
- Leave blank if number won’t receive inbound calls
Outbound Profile
- Choose which agent will use this number for outbound calls
- Supports one agent assignment per number
- Leave blank for inbound-only numbers
- Allow Outbound Calls toggle controls whether this number can make outbound calls
- When disabled, the number is restricted from making outbound calls
- Automation editor will display warnings when selecting agents with restricted numbers in select or multi-select inputs on outbound nodes
- Warnings appear dynamically based on the selected option’s
outbound_enabledproperty from the integration payload - Useful for compliance or cost control purposes
SMS Profile
- Assign which agent will handle SMS messaging for this number
- One agent per number for SMS capabilities
- Required for agents that need text messaging functionality
Outbound Calling Control
When an agent is assigned to the outbound profile, you can enable or disable outbound calling for that phone number: Enable/Disable Toggle:- Located in the outbound profile section of the edit modal
- When enabled (default): Agent can make outbound calls using this number
- When disabled: All outbound call attempts are blocked with a clear error message
- Incident Response: Immediately stop outbound calls during spam attacks or security incidents
- Operational Control: Temporarily disable outbound calling while keeping inbound calls functional
- Testing: Prevent accidental outbound calls during agent development
- Disabling outbound calling does not affect inbound calls or SMS functionality
- Outbound calls initiated via API, automations, or UI will all be blocked when disabled
- The toggle automatically resets to enabled when the outbound agent assignment is removed
Expected Results
After saving assignments:- Numbers display associated agent names in the main table
- Agents can now use assigned numbers according to their profiles
- Phone number becomes unavailable for reassignment to other agents in the same profile
- Outbound calling status is enforced across all call initiation methods
Regional Configuration
Region settings are only visible for supported numbers. If you don’t see the region dropdown when editing a phone number, it means that number doesn’t support regional configuration (e.g., non-Twilio numbers or certain number types).
Supported Numbers
Regional settings are available only for Twilio numbers, including:- Numbers purchased directly through Thoughtly (using Twilio)
- Numbers imported from your own Twilio account
Why Regional Settings Matter
Proper regional configuration:- Minimizes latency between Thoughtly servers and call destinations
- Improves call quality and connection reliability
- Reduces connection delays during call establishment
Setting Regions
- Edit the phone number using the pencil icon
- Locate the “Set Region” dropdown in the modal
- Select the region closest to where your agent will make calls
Regional Selection Guidelines
For US-based calling: Choose US regions (US East, US West, etc.) For International calling: Select the region geographically closest to your primary call destinations For Mixed calling patterns: Choose based on the majority of your call volume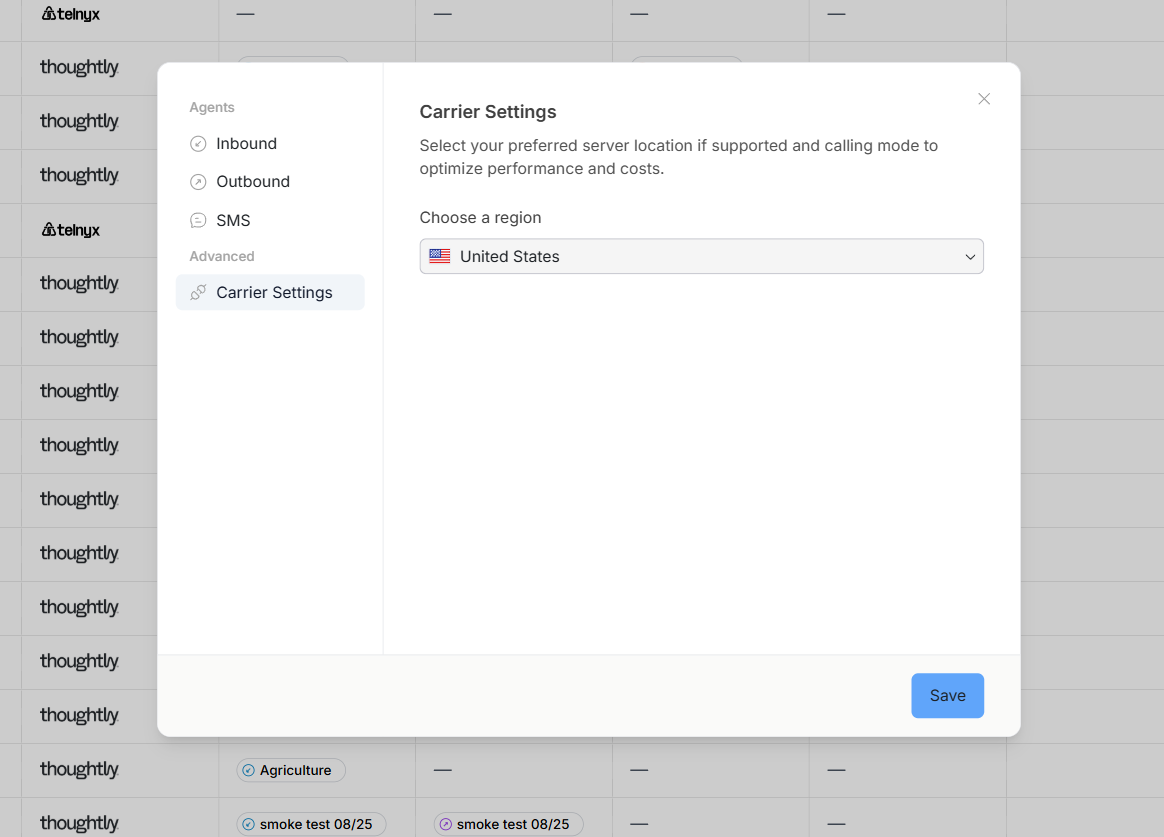
Regional settings dropdown
Incident Response
Stopping Outbound Calls During Emergencies
If you need to immediately stop outbound calling due to a security incident, spam attack, or other emergency:- Navigate to Settings → Phone Numbers in the platform navigation
- Locate the affected phone number
- Click Edit on the phone number
- Scroll to the Outbound Profile section
- Toggle “Outbound Calls” to disabled
- Save changes
- All outbound call attempts are immediately blocked
- Calls initiated via API, automations, or UI will fail with error: “Outbound calling is disabled for this phone number”
- Inbound calls and SMS continue to function normally
- The automation editor will display warnings when selecting agents with disabled outbound calling in select or multi-select inputs on outbound nodes
- Warnings appear dynamically based on the selected option’s
outbound_enabledproperty from the integration payload
- Spam attack on public form: Disable outbound calling to stop automated call floods while investigating
- Compromised API key: Disable outbound calling while rotating credentials
- Testing and development: Prevent accidental outbound calls during agent development
Configuration Best Practices
Agent Profile Strategy
Dedicated Numbers Approach:- Assign separate numbers for inbound, outbound, and SMS
- Provides clear separation of communication channels
- Easier to track and analyze performance per channel
- Use one number for multiple profiles on the same agent
- Simplifies customer experience with single contact point
- May require careful call routing consideration
Regional Optimization
High-Volume Operations: Always configure regions for optimal performance Testing Phase: Use default regional settings initially, optimize based on call quality feedback International Service: Research latency patterns to your target countriesManaging Multiple Assignments
Viewing Current Assignments
The main phone numbers table displays:- Which agent is assigned to each number
- Current regional settings (for Twilio numbers)
- Assignment status across all profiles
Reassigning Numbers
To change agent assignments:- Edit the existing assignment
- Clear current agent selection from dropdown
- Select new agent for the desired profile
- Save changes
Troubleshooting
Agent not receiving calls on assigned number- Verify inbound profile assignment is saved correctly
- Check that agent is active and properly configured
- Confirm number capabilities include Voice functionality
- Check if outbound calling toggle is enabled in the phone number settings
- Verify the outbound profile is assigned to an agent
- Confirm the agent has an outbound phone number configured
- Review automation editor for warnings about disabled outbound calling in select or multi-select inputs on outbound nodes
- Warnings appear dynamically when selected options have
outbound_enabledset tofalsein the integration payload
- Review regional settings for Twilio numbers
- Select region closer to call destinations
- Test with different regions if issues persist
- Verify SMS profile is assigned to correct agent
- Confirm number capabilities include SMS functionality
- Check that agent has SMS features enabled
- Ensure you have proper permissions for number management
- Verify agent exists and is active in workspace
- Contact support with Team ID and affected phone number if issues persist
Expected Results
After proper configuration:- Inbound calls route correctly to assigned agents
- Outbound calls originate from assigned numbers
- SMS messages send and receive through assigned agents
- Call quality is optimized for your geographic usage
- Agent assignments are clearly visible in the phone numbers table